
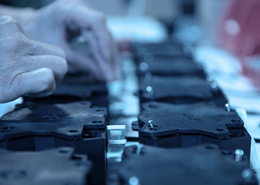
INJECTION MOULDING
Injection moulding parts and injection tools. Full solutions from design to production.
Strongest ever glass-fiber Nylon and PK 3D printing filaments launched by
Author:gly Date: 2024-09-30
Use your tape measure and a pencil to mark each of your dowel lengths with a cutting line, then cut each to size using your chop saw or universal saw.
Introduce touches of gold leaf or gold paint for a luxurious finish to the top of your stool. You can even use gold paint to practice your own golden repairs, highlighting accidental cracks or interesting textures.
Use your stools around the house as an additional surface. A great feature in any room from the living room to the hallway, add a statement lamp as a standalone piece or use as an easy to reach table.
Use different materials for the legs. Metal pin legs are a minimal and trendy choice, while old tool handles or mismatched offcuts as legs will make a fun talking point.
Sealing the concrete and dowel legs with varnish gives a lovely natural finish, however, the decorative options are endless. If you want to get creative with finishes, there are a whole host of ways to enhance your stool.
The concrete ratios and cure times will vary depending on the mix type and manufacturer you go for. Be sure to check the packaging instructions before starting to decide on the best mixing ratios.
Be experimental with your choice of container. Use a selection of buckets and differently shaped pots for interesting designs and unusual shapes.
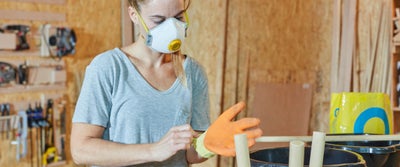
Using an electric sander and fairly coarse sandpaper, run the sander over the base of the stool to remove any imperfections. This will ensure that any rough edges are removed for a smooth finish. Remember to wear your dust mask and this can be a messy job.
If you find you have a minor wobble, you can use a coin or a small washer to help level things out and give your stool a little extra height. Simply put them into the bottom of your end cap before slotting or glueing everything back into place.
They can also be useful for levelling out legs that are a little uneven. It can be worth giving any especially wonky legs a sand down before adding feet to make levelling that bit easier.
Decide on the thickness of your stool. To do this, place your leg setting template in the centre of your empty container. To ensure the concrete doesn’t touch the template and set into your stool, put a piece of tape on the inside as a visual guide. If you’re not using a template, it can still be helpful to mark out the thickness using your dowel as a guide.
Choose coupling that is the same size or similar in diameter to your dowel legs. They should fit by twisting into place or glueing into position.
Once you’ve calculated the correct amount of cement mix, you will need to measure out the correct volume of water too. It’s a good idea to have a little extra water to hand in case the concrete begins to cure faster than you can mix.
The proprietary technology developed by Polyplastics captures and evaluates the gases and identifies the mechanism by which pyrolysis gas forms during the injection molding process.
During the injection molding process, high temperatures and speeds along with the deterioration of plastic additives can release high volumes of decomposition gases. Mold deposits, gas burns, and short shots caused by pyrolysis gas can lead to quality problems. These may include undesirable effects on the dimensions and appearance of molded parts, resulting in high defect rates. Maintaining efficient production operations is important as manufacturers work to meet challenging applications such as automotive electrification and automation, said Polyplastics in its announcement.
The company’s proprietary technology captures and evaluates the gases formed during molding and identifies the mechanism by which pyrolysis gas forms during injection molding. It traps gases according to mold-based methods, and uses gas chromatography mass spectrometers (GC/MS) to qualitatively and quantitatively analyze their composition, identify the gases that are formed, and make fundamental improvements to the sources of their formation.
Leaving to dry, we then removed the masking tape pulling back at a 45 degree angle to avoid cracking or peeling the paint.
Get creative with the decoration. High gloss varnish and a lick of paint can go a long way to customising your designs. Match the colour of the legs to a room or varnish in the same colour as your floorboards.
If you notice that your stool is wonky at a later stage, simply use the coin or washer technique to level things out. Slot an extra coin into the coupling feet, or glue directly to the base of your dowel.
Remove the template from the container if you’re using one, then pour in the cement mix up to your tape marker. Give the container a good shake to even out the surface.
A new testing method that identifies gas formation during the injection molding process helps to reduce mold deposits, according to engineering thermoplastics supplier Polyplastics Co. Ltd. The Tokyo-based company’s Gas Investigation Method in Injection Molding (GIMIM) reportedly facilitates continuous molding and improves production efficiency.
Now it’s time to varnish the underside and dowel legs of your stool. Varnish not only brings out the natural patterns and colour of both materials but also helps to seal the concrete, protecting the surfaces.
If you want to go for a more organic placement, position the legs into the concrete then secure the dowel by taping them to the side of the bucket with masking tape.
To decide on the length of your stool legs, it’s a good idea to offer up the dowel to your chosen container. When the legs are set into the concrete they will touch or be close to the bottom, so ensure that you add the approximate concrete depth to your measurements. We found that three 300mm legs work well as a low-level stool, while four 750mm legs make a great plant stand or end table.
You can even try painting the concrete tops or adding specialist cement dye to the mixture for bespoke colours. Try mixing up a small sample first, adjusting the colour until it’s just right.
Place your setting template into the mix or insert your dowel legs securing them to the container with your chosen method.
Locate your bag of concrete and an offcut or object for stirring. You should also fill a container with water or have access to a nearby water source.
And that’s it, your DIY concrete stools are complete. Position in the perfect spot for your cup of tea, favourite plant or table lamp.

You may also need to remove concrete overspill from the base of the dowel legs. Use fine-grit sandpaper to carefully rub the dowel down by hand.
Gather a selection of containers for mixing or setting. We recommend using plastic or silicone buckets for setting your concrete, as they offer some flexibility for removing the set stool. If the bucket isn’t pliable enough, you might end up cracking or damaging your concrete when you try to remove it after it sets.
Give the inside of your container a good wipe down and check for any cracks or splits. We decided to use a plastic bucket, a plastic plant pot and a silicone bucket.
Carefully set the stools aside. Most rapid-setting mixes will set within a couple of hours at room temperature, but we recommend leaving the mixture for 24 hours for a solid cure.
As the decorative possibilities are endless, you can choose to get creative with your stools at a later stage. Simply give everything a sand back to smooth down the surfaces, then varnish and paint for the perfect look.
If there are any natural patterns or textures in the concrete, follow them with your brush working from the centre outwards. This will ensure you have an even and stroke-free finish.
Whichever setting style you go for, don’t worry if the legs look like they’ve set a little unevenly. We’ll show you a number of ways to level things up later on.
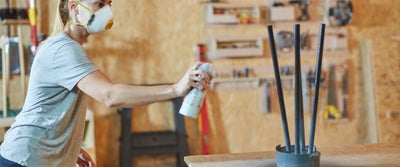
Once the primer dried, we gave the legs and base of the stool and couple of even coats of interior wood paint, using a paint brush to follow the direction of the grain.
When the gradient paint had dried, we finished off the stool by giving the legs a coat of spray lacquer varnish for a glossy shine.
Concrete is an absorbent material so apply the varnish generously. We recommend applying multiple coats, allowing each to dry in between.
The concrete will get darker as you varnish, but don’t be alarmed as this is entirely normal. You’ll notice that the concretes textures and natural colours reveal themselves as the varnish dries.
Once you’re happy that the concrete has been properly mixed, give the container a couple of taps against your workbench to remove any air bubbles.
Using a paint brush, generously apply a couple of even coats of the varnish to each of the legs. We chose a gloss finish for its reflective properties, but the choice is entirely yours depending on the look you’re going for.
Try using different styles and even objects as feet for the stool. You could even dip or paint the bottom of the dowel legs in a contrasting colour to the timber, using masking tape for crisp lines.
Using a supporting framework is another way to securely set the legs. Place offcut pieces of timber across the top of your bucket to hold your setting legs in place. If you like, you can secure the dowels to the timber with masking tape too.
GIMIM makes it possible to measure high-molecular-weight substances that can cause mold deposits. Since this method directly analyzes gases that are formed inside the mold during filling, it yields results that are closest to real-world conditions, according to Polyplastics. In further research, Polyplastics plans to examine other problems caused by pyrolysis gas, such as short shots and gas burn defects as well as mold deposits.
If you’re using rapid-setting cement as we did, you’ll need to work quickly and start mixing as soon as you add the water. The consistency should be that of a thick batter. Stir the mix thoroughly, being sure to scrape the bottom and sides to combine any clumps or residue.
Then apply a coat of varnish to the base of the stool. Use your brush to work the varnish in well to any indents, bubbles or cracks as this will help to seal the surface, providing additional strength.
The design and quantity of stool legs you go for will depend on the style of stool you want to create. Decide whether you’re going to evenly space the legs or angle out from the centre of the stool creating a wider base.
Once the concrete has completely set, remove the stool from the bucket by gently pulling on the dowel legs. Depending on how large your design is the stool might be quite heavy, so have another pair of hands around if you need help.
You can either measure out the cement mix by eye; weigh the bag and calculate the ratios; or transfer the exact amount of mix into another bucket.
The system’s configuration is divided into the three stages of plasticization, metering, and injection, and each unit is fitted with traps to segregate the gases that form within each part of the process.
Scale the design and try making a concrete bench using a windowsill plant pot. Set legs into either end for secure and stylish seating.
Choose your timber dowel for the legs. You can use what you have to hand or work with varying diameters for different looks. We worked with both 18mm and 28mm dowels but the choice is yours.
There’s no one way to set the concrete legs but you will want to ensure they are secured, so it’s a good idea to have some masking tape to hand. We experimented with several setting styles to achieve different looks.
We recommend priming timber before painting as this helps to create a smooth finish for other finishes to adhere to. We began by giving the dowel legs and base of the stool a good even coat with a spray paint primer.
A setting template can help keep the legs perfectly stable during the curing process. We used an old plant pot, but you can use whatever you have to hand. To make the setting template, align the prepared dowels around your chosen template then secure in place with masking tape.

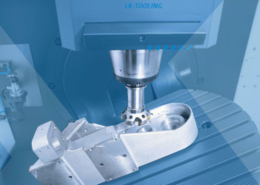
LK-Mould Ltd.,
No.15, JinShen Road, Jin xia District
Changan Town, Dongguan
523850 Guangdong
China